
builder
Nomad 베어메탈 서버에 Arbitrum full node 컨테이너로 배포하기 본문
Nomad는 내가 보기엔 아주 유용한 오케스트레이션 툴이지만, 국내에는 자료가 많이 없다. 직접 Nomad로 현재 운영 중인 베어메탈 서버에 Arbitrum full node를 배포해보는 테스트를 진행하려 한다. 그 과정에서 간단한 개념도 정리하려함.
Nomad install
wget -O- https://apt.releases.hashicorp.com/gpg | sudo gpg --dearmor -o /usr/share/keyrings/hashicorp-archive-keyring.gpg

echo "deb [signed-by=/usr/share/keyrings/hashicorp-archive-keyring.gpg] https://apt.releases.hashicorp.com $(lsb_release -cs) main" | sudo tee /etc/apt/sources.list.d/hashicorp.list

sudo apt update && sudo apt install nomad

dev 환경의 테스트 용이기 때문에 Nomad를 단일 서버에 클러스터를 배포했다. 실제 production 환경에서는 여러 서버를 통해서 가용성을 보장할 필요가 있다.
Nomad UI
Nomad는 Web Ui를 제공하여 서버 스펙, Job과 Variable, Evaluation 등 운영에 유용한 정보들을 쉽게 관리하고 확인할 수 있는 Web Ui도 제공한다.
클라이언트의 리소스와 정보까지도 모두 제공되기 때문에 아주 유용하다.
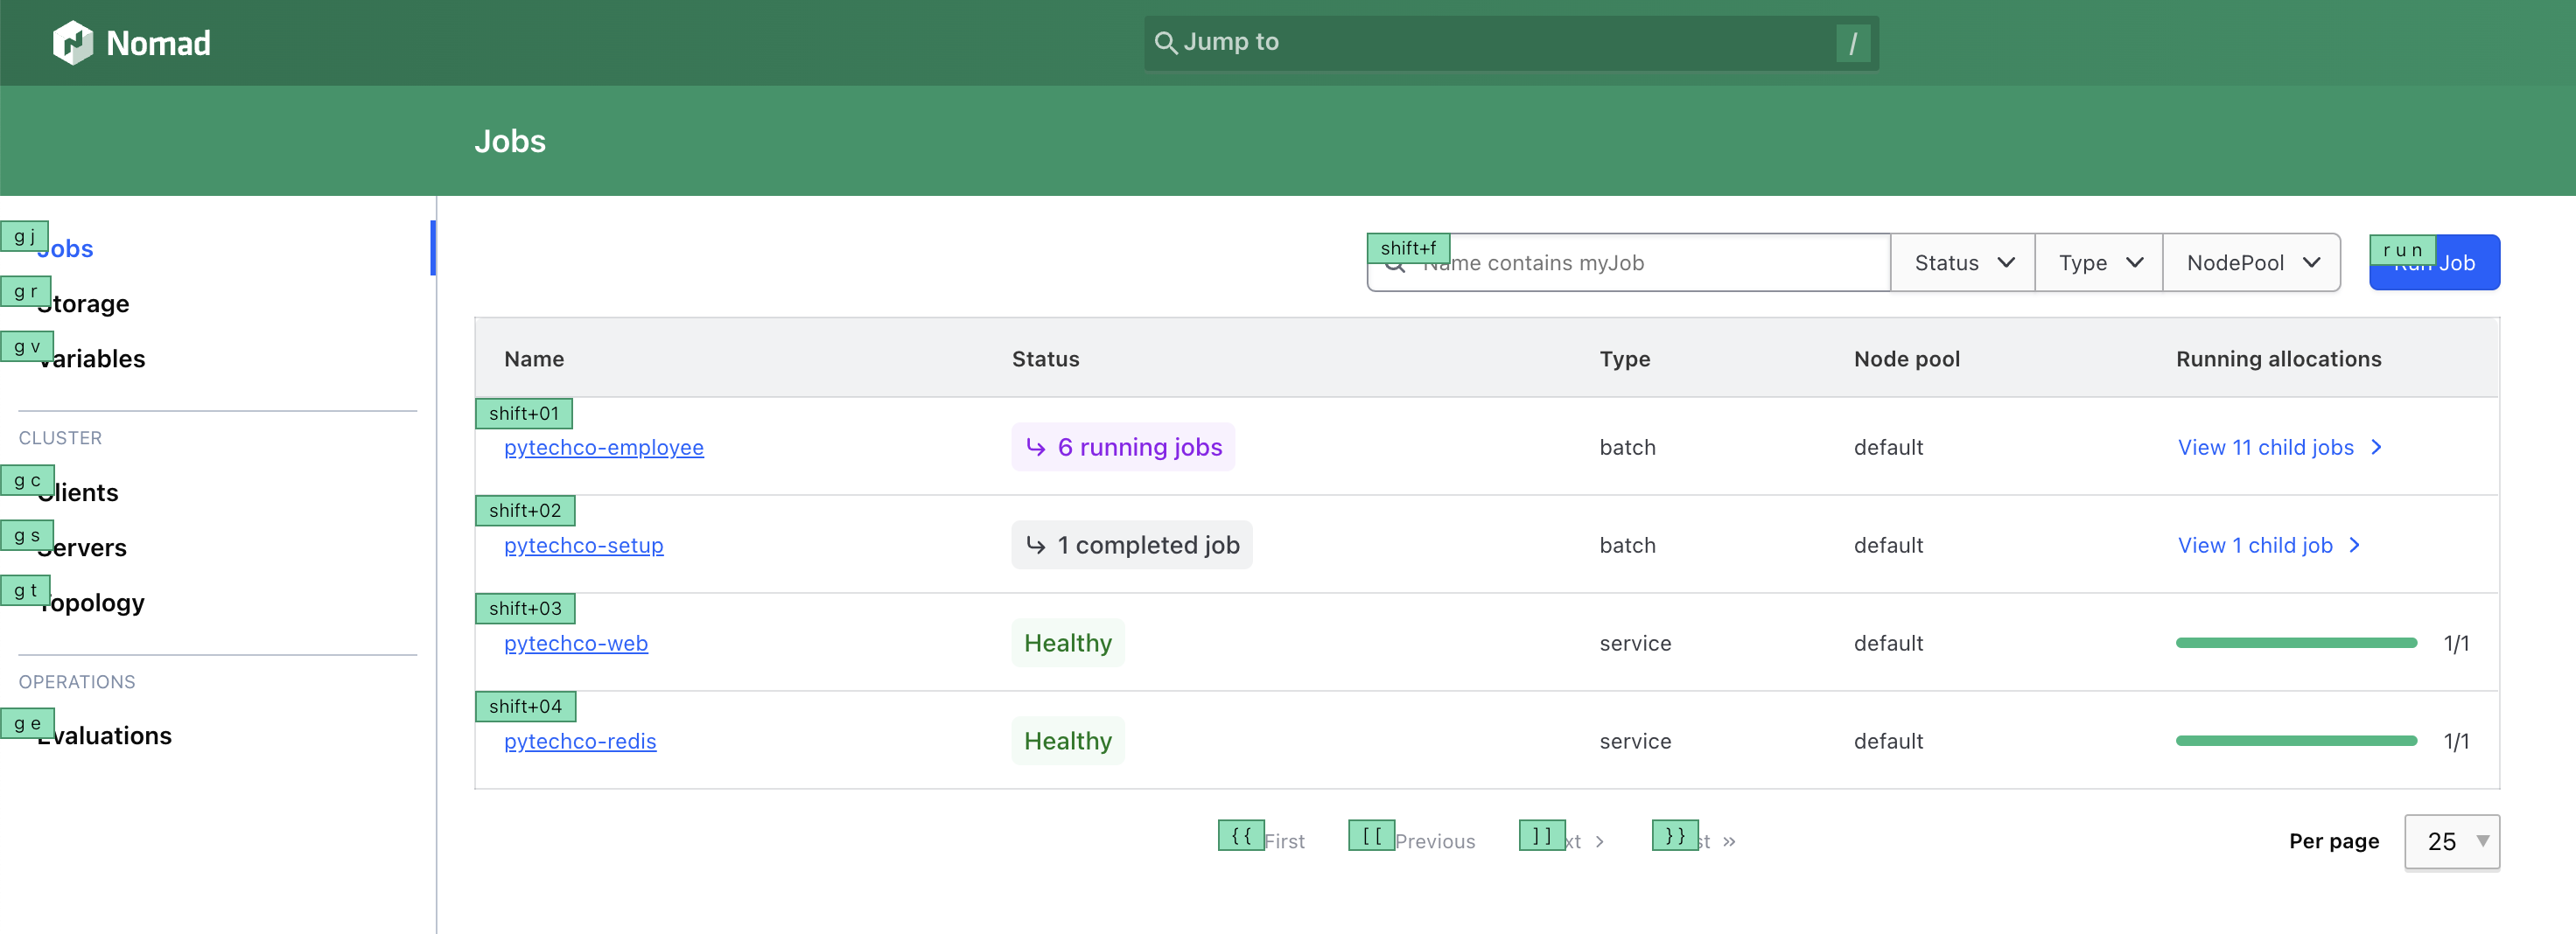
실행되고 있는 job도 실시간으로 모니터링할 수 있으며, 컨트롤 가능하다.
Two types of jobs
아비트럼 노드 배포에 앞서서, job에 대해서 알아보자. job의 종류는 2가지다.
- Service Job: 예외적인 중단이 있을때까지 길게 운영되는 Job
- Batch Job: 작업이 성공적으로 마무리되면 종료되는 단기적인 Job
여기서 두가지 block을 이용해서 job의 실행을 확장할 수 있다. parameterized block은 필수적인 혹은 선택적인 입력을 통해서 batch 작업을 트리거할 수 있으며, periodic block은 job이 설정된 시간에 실행되도록 예약할 수 있다.(Nomad의 cron job이라고도 함)
type의 지정은 job type에서 설정된다. 아래를 보면 redis job은 service, setup job은 batch로 정해진 것을 알 수 있다.
# redis job

job "pytechco-redis" {
  type = "service"
  group "ptc-redis" {
    count = 1
    network {
      port "redis" {
        to = 6379
      }
    }
    service {
      name     = "redis-svc"
      port     = "redis"
      provider = "nomad"
    }
    task "redis-task" {
      driver = "docker"
      config {
        image = "redis:7.0.7-alpine"
        ports = ["redis"]
      }
    }
  }
}
# setup job
job "pytechco-setup" {
type = "batch"
parameterized {
meta_required = ["budget"]
}
group "ptc-setup" {
count = 1
task "ptc-setup-task" {
# Retrieves the .Address and .Port connection values for
# redis-svc with nomadService and saves them to env vars
# NOMAD_META_budget is read from the job's meta vars
template {
data = <<EOH
{{ range nomadService "redis-svc" }}
REDIS_HOST={{ .Address }}
REDIS_PORT={{ .Port }}
{{ end }}
PTC_BUDGET={{ env "NOMAD_META_budget" }}
EOH
destination = "local/env.txt"
env = true
}
driver = "docker"
config {
image = "ghcr.io/hashicorp-education/learn-nomad-getting-started/ptc-setup:1.0"
}
}
}
}참고로 batch job은 job run을 하면 아래와 같이 'registration successful' 이라는 ouput이 나온다. 이는 batch job이 등록되고 필요에 따라 매개변수와 함께 어떤 이벤트를 위해 job을 실행하기 위해서 등록되었다고 보면 된다.
$ nomad job run pytechco-setup.nomad.hclJob registration successful등록된 job을 일회성으로 실행 시키기 위해선 nomad job dispatch 명령어를 사용하면 된다.
Server, Client Configuration
nomad는 쿠버네티스의 마스터 노드 역할을 하는 '서버'와 워커 노드 역할을 하는 '클라이언트'로 구성된다. 에이전트 실행을 위해 다음과 같은 hcl 을 구성했고, nomad agent -config={{ configuration.hcl }} 로 실행했다.
# Server

server {
  enabled = true
  bootstrap_expect = 3
}

data_dir = "/opt/nomad"
bind_addr = "0.0.0.0"

log_level = "DEBUG"

advertise {
  http = "SERVER_NODE_IP:4646"
}
# Client
client {
enabled = true
servers = ["SERVER_NODE_IP1:4646"]
}
data_dir = "/opt/nomad"
bind_addr = "0.0.0.0"
log_level = "DEBUG"
Deploy Arbitrum full node
아비트럼 full node는 공식 문서에선 docker로 실행하라고 가이드하고 있다.

nitro 도커 이미지를 사용하고, 초기화를 위한 snapshot 파일을 위 URL을 통해서 설정하거나 미리 받아서 경로로 설정할 수 있다. snapshot 데이터가 크기 때문에 미리 베어메탈 서버에 다운로드해놓고 실행하는 것이 좋지만, 빠르게 테스트를 하기 위해서 url로 실행과 동시에 받는 걸로 진행하려고 한다.
job을 굳이 2가지로 구성해야한다면 service job은 arbitrum full node, batch job은 snapshot을 다운받는 용도로 실행하면 된다.
하지만 굳이 batch job을 구성할 필요는 없기에 full node를 위한 service job만 실행하겠다. 위 가이드에 맞추고, 다른 서버에서 테스트한 실행 커맨드를 기준으로 아래와 같은 Job을 구성했다.
Arbitrum full node Service Job
job "arbitrum-one" {
  datacenters = ["dc1"]
  type = "service"

  group "arbitrum-group" {
    count = 1

    network {
      port "http" {
        static = 8547
      }
      port "ws" {
        static = 8548
      }
      port "metrics" {
        static = 6070
      }
    }

    task "arbitrum-task" {
      driver = "docker"

      config {
        image = "offchainlabs/nitro-node:v2.3.4-b4cc111"
        volumes = [
          "/mnt/arbitrum_nitro:/home/user/.arbitrum"
        ]
        args = [
          "--parent-chain.connection.url", "{{ L1 RPC }}",
          "--parent-chain.blob-client.beacon-url", "{{ L1 BEACON RPC }}",
          "--chain.id", "42161",
          "--http.api", "net,web3,eth,debug,arbtrace",
          "--http.corsdomain", "*",
          "--http.addr", "0.0.0.0",
          "--http.vhosts", "*",
          "--ws.port", "8548",
          "--ws.addr", "0.0.0.0",
          "--ws.origins", "*",
          "--init.url", "https://snapshot.arbitrum.foundation/arb1/nitro-pruned.tar",
          "--metrics",
          "--metrics-server.addr", "0.0.0.0",
          "--http.server-timeouts.read-header-timeout", "60s",
          "--http.server-timeouts.read-timeout", "60s",
          "--http.server-timeouts.write-timeout", "60s",
          "--execution.sequencer.forwarder.connection-timeout", "60s",
          "--execution.forwarder.connection-timeout", "60s",
          "--execution.rpc.gas-cap", "600000000"
        ]
      }

      resources {
        cpu    = 2000
        memory = 2048
      }

      service {
        name = "arbitrum-one"
        port = "http"
        tags = ["http"]
	provider = "nomad"
        check {
          type     = "tcp"
          port     = "http"
          interval = "10s"
          timeout  = "2s"
        }
      }

      service {
        name = "arbitrum-one-ws"
        port = "ws"
        tags = ["ws"]
	provider = "nomad"
        check {
          type     = "tcp"
          port     = "ws"
          interval = "10s"
          timeout  = "2s"
        }
      }

      service {
        name = "arbitrum-one-metrics"
        port = "metrics"
        tags = ["metrics"]
	provider = "nomad"
        check {
          type     = "tcp"
          port     = "metrics"
          interval = "10s"
          timeout  = "2s"
        }
      }
    }
  }
}
(datacenter는 설정하지 않을경우 *가 default)

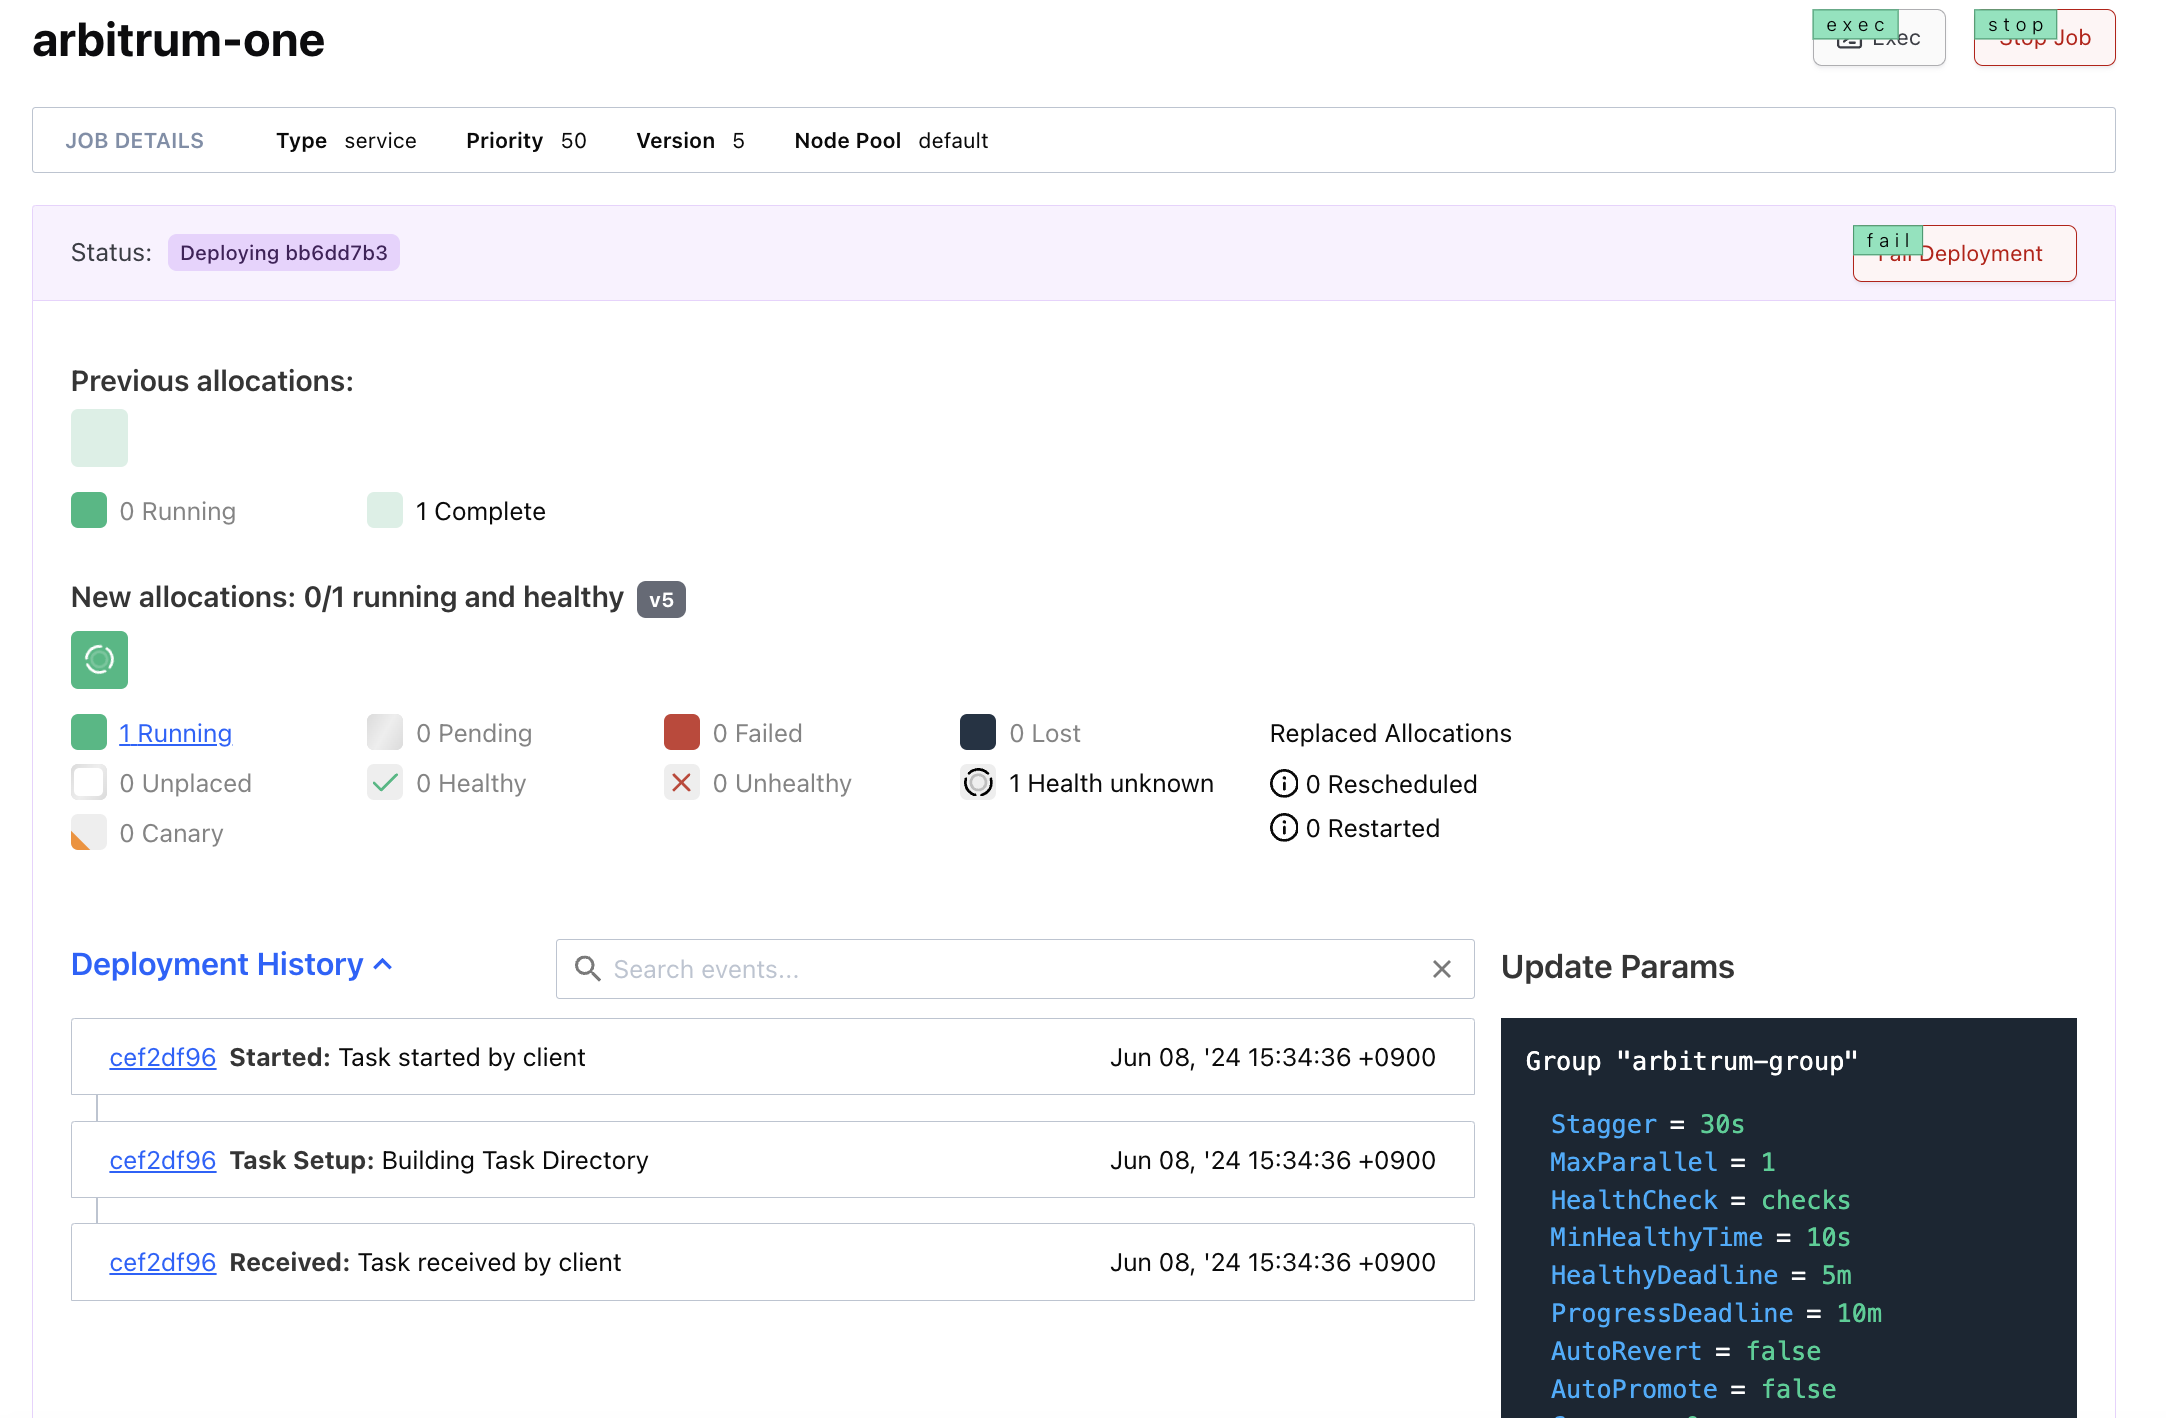
job을 배포하면 아래와 같은 과정이 진행된다.
- job에 트리거되어 evaluation이 시작
- evaluation은 'bb6dd7b3'에서 배포
- 'fc1b199f' 노드에 'arbitrum-group'의 allocation 'cef2df96'이 생성
- evaluation은 allocation에 의해서 pending 에서 complete로 상태변경
- 'bb6dd7b3' 배포 진행
nomad UI를 확인하면 아래와 같이 job이 진행되고 있는 것을 확인할 수 있다. Deployed 상태에서 Desired는 evaluation 트리거, Placed는 allocation의 배치 단계라고 보면 된다. 만약 Placed가 진행되지 않는다면, allocation 과정에서 문제가 발생했을 가능성이 높다.
job을 작성하고(server), 클라이언트에 할당하여 실행(client)하는 이 두 단계의 로그를 확인해볼 필요가 있다.
- Allocation (할당): 작업이 클라이언트 노드에 할당되어 실행되는 과정.
- Evaluation (평가): Nomad가 작업의 상태를 평가하고, 필요한 변경 사항을 적용하는 과정.
allocation은 노드에 할당하여 실행되는 것으로 아래와 같이 allocation의 로그도 확인가능하다. 로그를 보면 snapshot data를 받고 있는 것을 알 수 있다.

Container에 할당된 리소스와 사용중인 리소스를 모니터링할 수 있으며, Container 터미널 실행도 web ui에서 가능하다.

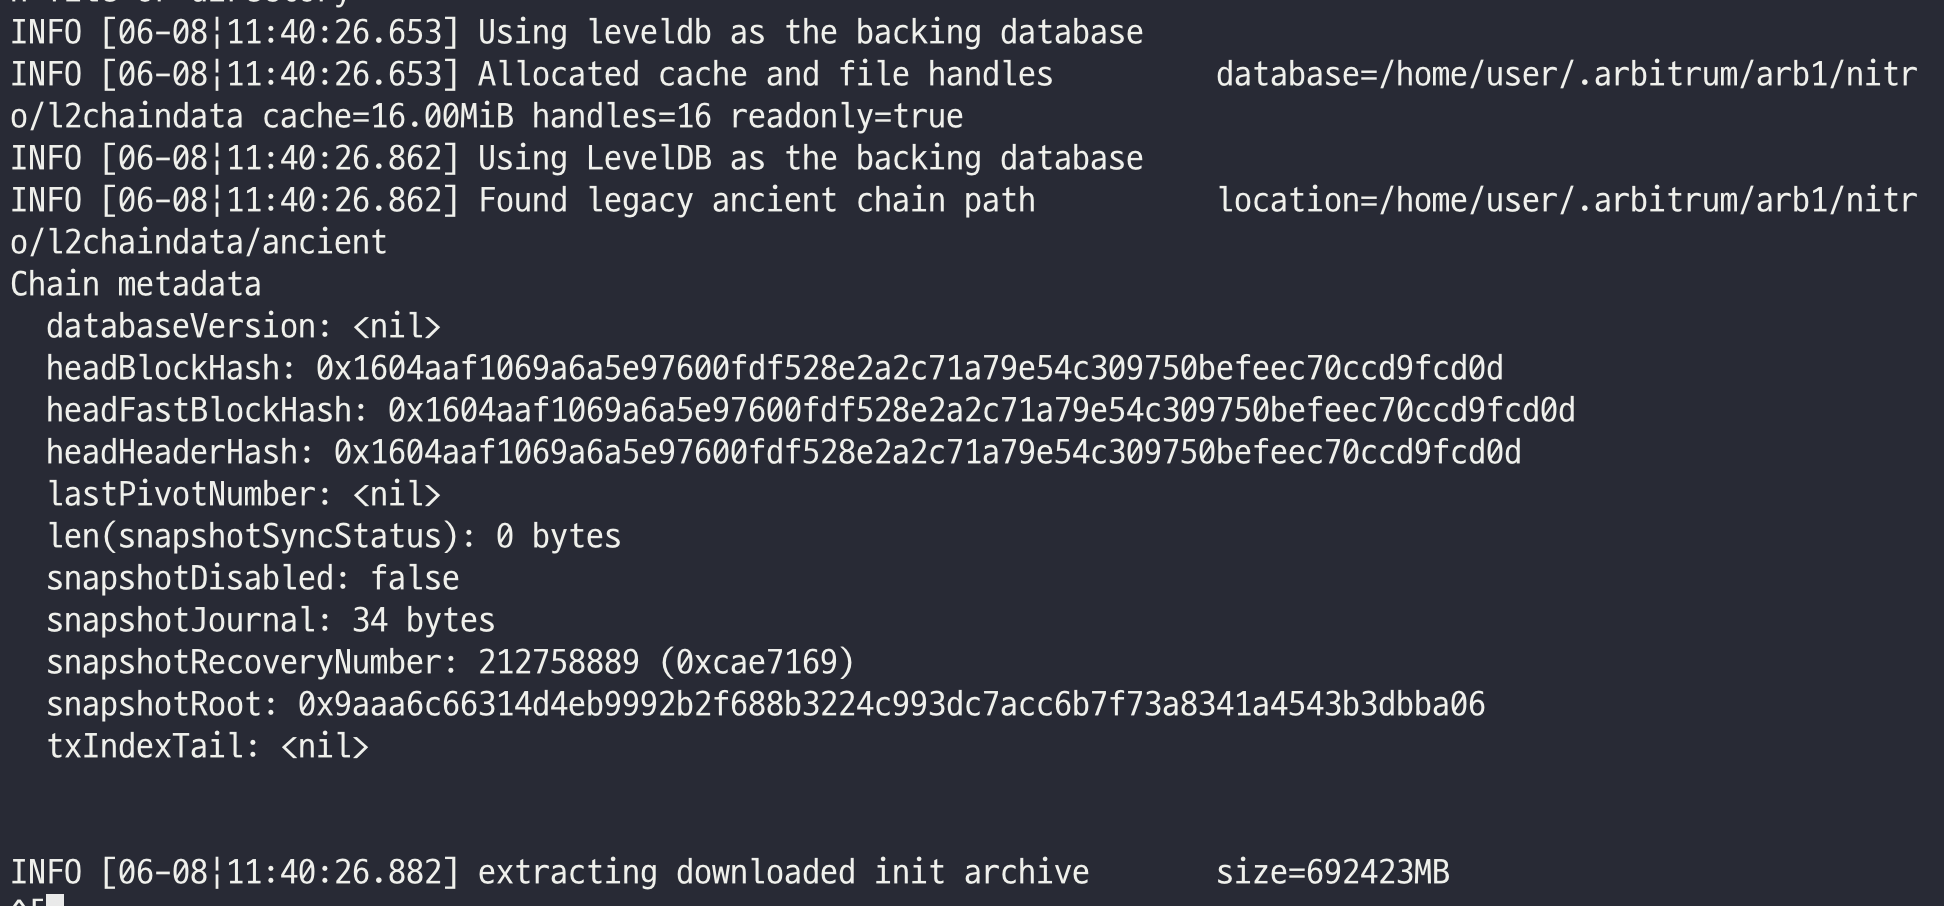
클라이언트에서 arbitrum의 docker container가 실행되고 있는 것을 알 수 있다. snapshot 모두 받고 초기화가 된다해도 여기서 끝난것은 아니다.
health check와 log의 특정 조건을 통해 프로세스에서 발생하는 문제를 어떻게 대응할지도 고민해야한다. 실제 운영 환경이라면 서버와 프로세스의 health check + event 모니터링을 위해 Consul 지원도 고려해야한다.
'DevOps > Nomad x Consul' 카테고리의 다른 글
| Constraint ${attr.consul.version} semver >= 1.8.0 1 nodes excluded by filter 에러 해결 방법 (0) | 2024.06.08 |
|---|---|
| Hashicorp Nomad Scheduling (0) | 2024.06.06 |

